Java实现的小飞机避障游戏项目
前述:基于在学习了一些Java基础知识后,通过视频的学习完成了以下这个小 demo,能够将所学的一些基础知识进行融合巩固,而且还可以稳固继续学习的兴趣,可以作为新手入门的小训练。
游戏内容:
- 游戏主窗口的建立
- 图形绘制,图像加载
- 线程内部类实现动画
- 游戏物体类的实现
- 键盘控制游戏物体原理
- 双缓冲解决闪烁问题
- 矩形碰撞检测
- 图像数组轮播处理
游戏结构的说明:
- 源码地址:小飞机避障游戏源码
- 类说明:
进入PlaneGame/bin/cn/sxt/game/ 即到达游戏的类文件夹
Constant: 常量类
Explode:爆炸类
GameObject:游戏物体类
GameUtil:获取图像工具类
MyGameFrame:主窗体类
Plane:飞机类
Shell:炮弹类 - 图片说明:
进入PlaneGame/bin/images/
bg.jpg: 背景图
plane.png:飞机图
explode:爆炸图组主要技术实现:
-
常量类的设置
关于常量类的设置说明一下,常量类是为了储存一些常量数据而设置的,通过常量类将这些常量的具体数值封存在常量类中,方便程序的改动和检查,尤其是一些需要经常改动的数据,常量类的存在大大增强了程序代码的可改性。 通常放在较后步骤来实现,这里为了方便说明,故此放在了开头。
public class Constant { //常量类方便后续修改 public static final int GAME_WIDTH = 500; public static final int GAME_HEIGTH = 500; public static final int TIME_SLEEP= 40; public static final int PLANE_SPEED= 4; public static final int SHELL_SPEED= 2; public static final int START_X= 250; public static final int START_Y= 250; public static final int SHELL_NUM= 50; } -
游戏窗口的实现
游戏窗口类MyGameFrame 继承自Frame类,在MyGameFrame类中建立一个launchFrame()方法,在launchFrame()方法中设置窗口的参数(包括标题、窗口可见、窗口大小和窗口位置)。再在launchFrame()中创建窗口监听使游戏的进程随着窗口的关闭而结束。最后在main()方法中new出游戏窗口类的对象f,并调用launchFrame()方法即可得到窗口。
public void launchFrame() { this.setTitle("飞机小游戏"); this.setVisible(true); //使主窗口可见 this.setSize(500, 500); //设置窗口大小 this.setLocationRelativeTo(null); //使主窗口居中 this.addWindowListener(new WindowAdapter() { //匿名内部类 public void windowClosing(WindowEvent e) { System.exit(0); } }); } //主函数 public static void main(String[] args) { MyGameFrame f = new MyGameFrame(); f.launchFrame(); } -
构建工具类获取图片
工具类的主要是返回图片指定对象,定义得到图像的方法。
  public class GameUtil {

      //工具类一般将构造器私有化
  	private GameUtil() {
  	}
  	public static Image getImage(String path) {
  		BufferedImage bi = null;
  		try {
  			//从.class文件入在包目录下手获取图片的url
  			URL u = GameUtil.class.getClassLoader().getResource(path);
  			bi = ImageIO.read(u);   //ImageIO中读取图像的方法
  		} catch (IOException e) {
  			e.printStackTrace();
  		}
  		return bi;
  	}
  }
这里需要讲一下BufferedImage和Image的区别:Image是一个抽象列,BufferedImage是Image的实现,BufferedImage的主要作用就是将一副图片加载到内存中。 类.class.getClassLoader().getResource(path)是一个以.class文件从包目录下读取文件的方法,避免了使用绝对地址的尴尬,建议使用。 再就是IO读文件的时候对bi进行一个异常的抓抛。
-
游戏物体的实现
游戏物体父类:
作为游戏物体父类,没什么好说的,在类中定义了物体的各种属性(包括物体图片、物体位置坐标、物体速度和物体宽高),构建各种有参无参构造器,后续还加了一个Rectangle getRect()方法,是为了得到物体的矩形属性,方便后期碰撞检测的实现。
  public class GameObject {
  	//定义游戏物体类
  	//类属性
  	Image img;
  	double x,y;
  	int speed;
  	int width,height;

  	//用画笔画出物体
  	public void drawSelf(Graphics g) {
  		g.drawImage(img, (int)x, (int)y, null);
  	}

  	public GameObject(Image img, double x, double y, int speed, int width, int height) {
  		super();
  		this.img = img;
  		this.x = x;
  		this.y = y;
  		this.speed = speed;
  		this.width = width;
  		this.height = height;
  	}

  	public GameObject(Image img, double x, double y) {
  		super();
  		this.img = img;
  		this.x = x;
  		this.y = y;
  	}

  	//GameObject作为父类,保证其无参构造器的存在
  	public GameObject() {
  	}
      //返回物体所在的矩形方便碰撞检测
  	public Rectangle getRect(){
  		return new Rectangle((int)x,(int)y,width,height);
  	}
  }
飞机子类:
在飞机类中主要增加了通过键盘输入来控制飞机行走的功能,其中(left,right,up,down)是方向属性,live是生命属性(方便后期碰撞检测记录飞机的生存状态)。 Plane类中还增加了addDirection(KeyEvent e)和minusDirection(KeyEvent e)两个方法,分别在按下,松开方向键时将方向属性的boolean值进行改变,从而来达到录入方向的目的。还增加了drawSelf(Graphics g)方法,通过画笔g的drawImage(img,x,y,null)方法画出物体。
    public class Plane extends GameObject{
    	boolean left,right,up,down;

    	//判断飞机生命状况
    	boolean live = true;
    	public void drawSelf(Graphics g) {

    		if(live) {
    			g.drawImage(img, (int)x, (int)y, null);

    			//对按下的键做出判断,并在相应的方向上运动
    			if(left) {
    				x -= speed;
    			}
    			if(right) {
    				x += speed;
    			}
    			if(up) {
    				y -= speed;
    			}
    			if(down) {
    				y += speed;
    			}
    		}
    	}

    	public Plane(Image img, double x, double y) {
    		super(img, x, y);
    		this.img = img;
    		this.x = x;
    		this.y = y;
    		this.speed = Constant.PLANE_SPEED;
    		this.width = img.getWidth(null);
    		this.height = img.getHeight(null);
    	}

    	//按下方向键,增加方向
    	public void addDirection(KeyEvent e){
    		switch (e.getKeyCode()) {
    		case KeyEvent.VK_LEFT:
    			left = true;
    			break;
    		case KeyEvent.VK_RIGHT:
    			right = true;
    			break;
    		case KeyEvent.VK_UP:
    			up = true;
    			break;
    		case KeyEvent.VK_DOWN:
    			down = true;
    			break;
    		}
    	}
//按下方向键,减方向 public void minusDirection(KeyEvent e){ switch (e.getKeyCode()) { case KeyEvent.VK_LEFT: left = false; break; case KeyEvent.VK_RIGHT: right = false; break; case KeyEvent.VK_UP: up = false; break; case KeyEvent.VK_DOWN: down = false; break; } }
}
炮弹子类:
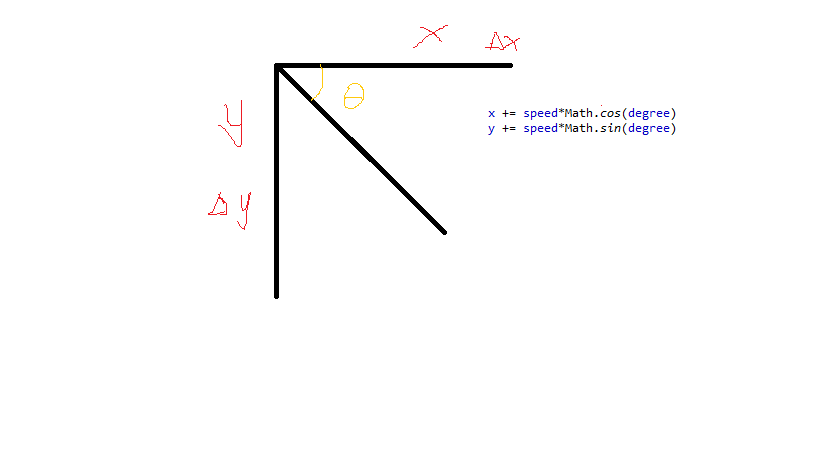
Shell类增加了degree(角度)属性,用画笔g的fillOval(x,y,width,height)方法画出一个实心圆来表示炮弹,这里还需要说一下炮弹飞行的方式:
    degree = Math.random()*Math.PI*2;
    //炮弹沿任意角度去飞
	x += speed*Math.cos(degree);
	y += speed*Math.sin(degree);
在这一段代码,通过random()随机出degree的值,其飞行时各增量如图:
 Shell类中还限制了炮弹运动区域,使炮弹碰壁反弹。其原理是根据物体入射反射的角度差。
    if(x<0||x>Constant.GAME_WIDTH-width){
    			degree = Math.PI - degree;
    		}
	if(y<30||y>Constant.GAME_HEIGTH-height){
		degree = - degree;
	}
-
爆炸图片连载的实现
爆炸类的实现:
在Explode类中静态定义了16张图片,不用每张图片都再次new(),减少资源的消耗。通过画笔g依次画出爆炸的图组,来实现爆炸图片的连载。
public class Explode { double x,y; static Image[] imgs = new Image[16]; static { for(int i=0;i<16;i++) { imgs[i] = GameUtil.getImage("images/explode/e" +(i + 1)+ ".gif"); imgs[i].getWidth(null); } } int count=0; public void draw(Graphics g) { if(count<=15) { g.drawImage(imgs[count], (int)x, (int)y, null); count ++; } } //爆炸位置坐标 public Explode(double x,double y) { this.x = x; this.y = y; } -
双缓冲解决图片闪烁问题
当游戏画出用户看到的画面时,如果画面只是被逐步渲染出来,类似于看水流慢慢蜿蜒而下, 用户以这种方式逐步观看视图,那么该画面并不连贯。实际上图片需要很快更新,显示一系列完整的画面,画面中每个对象都是立即出现。对于这个现在也不必过分深究,可以在后续学习中慢慢接触了解。
private Image offScreenImage = null; public void update(Graphics g) { if(offScreenImage == null) offScreenImage = this.createImage(Constant.GAME_WIDTH,Constant.GAME_HEIGTH); Graphics gOff = offScreenImage.getGraphics(); paint(gOff); g.drawImage(offScreenImage, 0, 0, null); } -
飞机移动动画效果的实现
线程内部类重画飞机:
通过线程调用不停地重画飞机图片来实现飞机位置的实时更新。 class PaintThread extends Thread{
public void run() { while(true) { repaint(); try { Thread.sleep(Constant.TIME_SLEEP) //线程休眠时间,适应人眼 } catch (InterruptedException e) { e.printStackTrace(); } } } } -
多发炮弹生成与时间计算
建立炮弹数组实现多发炮弹的生成:
这里也可以考虑用容器,效果相同,方法类似。 建立炮弹数组:
Shell[] shells = new Shell[Constant.SHELL_NUM];画出数组中的每一个炮弹:
 		for(int i=0;i<shells.length;i++) {
 			shells[i].draw(g);
在窗口初始化炮弹数组
		for(int i=0;i<shells.length;i++) {
			shells[i] = new Shell();
		}
-
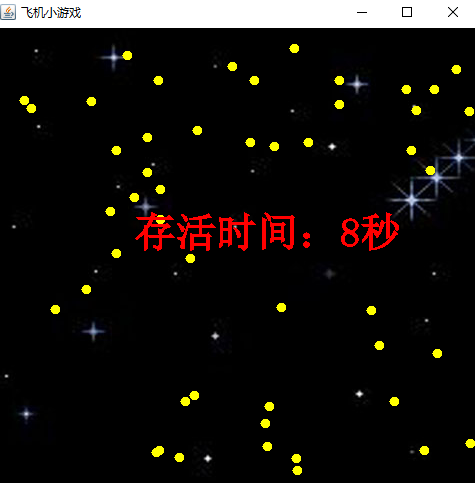
计算游戏时间
这里用到了peroid来记录时间过程,用了Date类的getTime()方法来获取时间,这里主要是要注意以下startTime和endTime对象生成的位置,startTime一开始就被new出来了,而endTime则要放在碰撞检测飞机爆炸后再new出来。
peroid = (int)((endTime.getTime()-startTime.getTime())/1000);
技术反思
主要反思一下自己在完成这个小游戏的过程中犯的低级错误。
- 构造器问题:GameObject父类中没有设置无参构造器,子类程序段报错。一般父类中都生成无参构造器较好。
- 没有添加下列代码段中的if(bao==null)判断语句,导致不断生成爆炸位置而报错。
-
if(bao == null) {
					bao = new Explode(plane.x, plane.y);
					endTime = new Date();
					peroid = (int)((endTime.getTime()-startTime.getTime())/1000);
				}
	    bao.draw(g);
	}
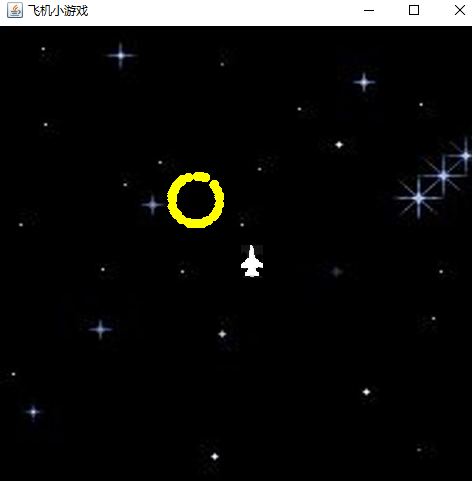
成果展示